Pattern Review: True Crush Cardigan from Ellie & Mac


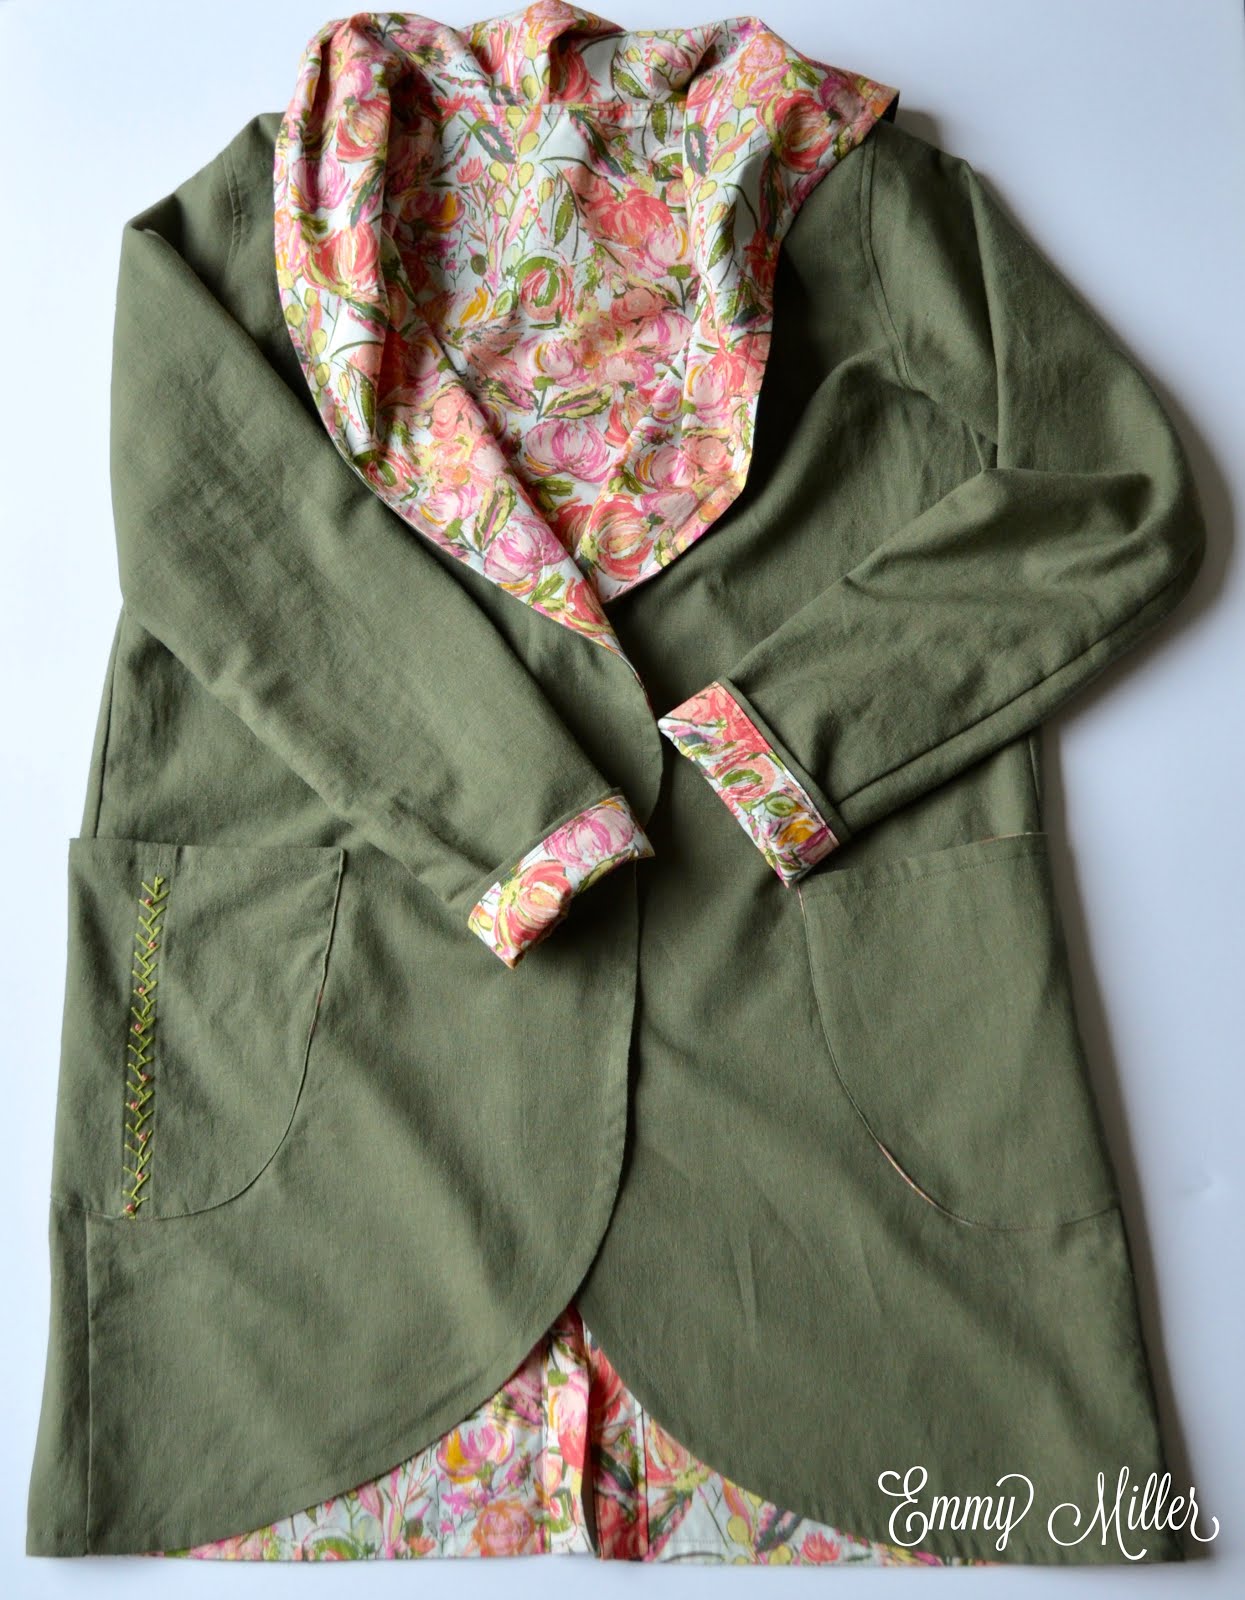
I love the rounded front of this Ellie and Mac cardigan, and I knew I wanted to make a few modifications to make mine more of a jacket. Although the pattern can be sewn in woven or knit, most of the photos I could find online were knit versions. I was set on making a woven version in a solid green linen with a bright and happy floral lining. I measured between sizes so I just chose the larger size to be sure it fit since it wouldn't stretch. (The Facebook group is very active and one of the admins connected me with a sewist who had made hers in woven, which was helpful! I wanted to be sure that I was on the right track with sizing and she said I'd be just fine.) I did add length per the instructions for my height.

I used linen from my stash and ended up with about a yard less than I'd hoped. I had to piece together the hood, but I saw it as an opportunity to use some hand embroidery at the seam to make the imperfection a bit festive. It was such a "happy accident" and I love how it looks!


I made sure to press all my seams as I sewed, and even topstitched a few (like the hood to the main) so that my linen wouldn't get wonky. I trimmed all curves with pinking shears and pressed seams to one side.

I made lined sleeves so that when I roll them up the cuff would be pretty, as well as to avoid weirdness with the linen.

I enlarged the pocket pattern piece by about 1/2" on each edge. I ran out of linen so I had to piece one of them together, but that was just another opportunity for a little embroidery to decorate the mishap. I made sure to topstitch the top edge before sewing the pocket to the jacket.


To give the back more movement I cut a vent and finished the raw edges with a placket.

I plan to add green belt loops and a sash to cinch the waist, but I completely ran out of the linen and will have to wait for another yard to arrive from Hawthorne Supply Company. I'll update this post with more photos once it's finished.

If I make this pattern in woven again I'll probably make the sleeves less tapered at the cuff and maybe taper the waist in a bit. I also think this would look great with a giant button and loop to close it in the front.


You can get your copy of the pattern here.

*This post may contain affiliate links, which partially fund my fabric hoarding at no cost to you.

Pattern Review: Good Vibes Joggers by Ellie and Mac

Now that I have a serger I wanted to try out a knit pattern for myself, and I am always looking for the perfect pair of cozy pants. I have a hard time with store-bought pants because they are always too short. I'm not all that tall but I like my pants to come down to my feet, so this was a perfect project!


I got some super-soft Art Gallery knit and the Good Vibes Joggers pattern and went to work! I did the yoga waistband and the "tall" option on the pattern and got a really great fit! I was surprised at how quickly these came together. I'd say from cut to finish you could get these completed in an hour!


Photos taken by my very proud and delightful 6 year old.
You can get this pattern over at Ellie and Mac.

*This post may contain affiliate links, which partially fund my fabric hoarding at no cost to you.

Pattern Review: Birch Button Up from Sew a Little Seam

I've sewn a ton for my daughter and a good bit for myself, but my boys have gotten next to nothing. A pair of shorts here or there (although they really don't care). I decided to stretch my skills and learn how to sew a button up shirt so I could sew some things for them. I considered several patterns but chose the Birch Button Up based on reviews/recommendations, the number of variations/options included, and the wide size range (3m - 16y). This was my first foray into a collar stand, placket, and pretty much any other element particular to a button front shirt.

With a pattern like this, the more options you choose, the more you will be cutting and interfacing. This part of the process always annoys me when what I really want to do is get going and see my creation come to life! I let my older son choose the look he wanted for the shirt as he planned to wear it for school picture day. He chose the two pleated pockets with the flaps, the roll-tab sleeve, and a partial placket.


The instructions on this were clear and extensive but I resolved to try a full placket next time to make the process (and dressing) simpler. Most importantly, he loved his new robot shirt!


My younger son wanted in on the mom-made shirts so I got this adorable Sarah Jane fabric and made him his own. I opted for the simple pocket which was quick and easy. Rather than using buttons I made this one with snaps for self-dressing and a pop of color.


I did the slit side option this time, which in my opinion wasn't worth the time or effort. It's small and barely noticeable and I felt like the time could have been better spent on another area of the shirt.


I did the full placket which saved time over the partial placket, and chose the simple short sleeve since I was using snaps and wasn't sure the snap would hold through all the layers of the roll-tab.


I had to piece together the back yoke due to fabric shortage but was able to make a center seam so it wasn't terribly noticeable. He loves his new shirt and it really looks darling on him!


I circled back to sewing for my oldest when I found this amazing map fabric. I intended to again do a full placket but I used my already cut pattern pieces and wasn't paying much attention when cutting, so I ended up with another partial placket top. It did go quicker this time around but I've made a note to cut a new front pattern piece going forward. I opted for the simple pocket and roll-tab sleeve in a coordinating fabric.


I also used the airplane fabric for the inside of the collar stand. The metal buttons are from Hobby Lobby and on a whim I decided to stitch them on with red thread.

I also added a little X on the map for where we live,  just for fun.
Rather than using a size tag, I used a fabric marker to write the size on the inside of the neck in Roman numerals (just seemed right?). 


I can't wait to see my blue-eyed boy in this dapper shirt once the weather warms up!

Forgive the wrinkles. Naptime photos are hasty.

You can find the Birch Button Up pattern here.

*This post may contain affiliate links, which partially fund my fabric hoarding at no cost to you.
01 09 10